Tuesday, August 31, 2010

Flower Soft Blog Hop brought to you by the color YELLOW!

Ready for a hop? How about a challenge too?

This week’s challenge – Use your favorite color (or colors) of Flower Soft!!!

We’ll be giving away TWO prize packages! One prize package will be given away on the blog hop and another will be chosen among people who make a card using Flower Soft and post it in the Splitcoast Gallery using the keyword FSC01. Both prize winners will be chosen and announced on the Flower Soft blog on September 8th. The winner of the Splitcoast Gallery challenge will have their card featured on the Flower Soft Blog on September 10th!!!


As you make your way through the hop make sure you comment on each and every post. There will be a prize winner chosen randomly among the blogs. The prizes (one set for Splitcoast players and one set for the blog hop!) :

Moments in Time Stamp set Man of the Match
Ultra Fine Toffee Flower Soft
Ultra Fine Sage Flower Soft
Flower Soft Glue


The prize winner will be announced on the Flower Soft Blog on Wednesday September 8th. Good luck!


If you didn’t start at the beginning of the hop please go to the beginning at the Flower Soft Blog.


Now on to my card for the HOP.
When you ask me what my favorite color is I am going to normally say red but this time, I just have to say the wonderful Sunshine Yellow Flower Soft. 

I combined using the yellow on this little duck image and my card goes along with the Card Positioning Systems sketch for this week. Flower Soft is the sponsor at CPS all week long. 
Look at this close-up of the duck. Is this just too much! The cupcake stamp is by Impression-Obsession. I colored it very softly with Copic markers and then gave the duck a coat of the Sunshine Yellow Flower Soft.  Not only can you win some Flower Soft through the blog hop today but also through CPS, all you need to do is make a card using the sketch. 


We are already talking about yellow so I wanted to share this card using the Get Sketchy sketch for this week. 
The circle designs are actually button stamps by Pink Persimmon.  Gotta love these BasicGrey papers with that yellow.
All I did for the button circles was to stamp then with black ink and then I embossed them with clear embossing powder.  I punched them out with a circle punch and then rubbed a Fluid Chalk stamp pad directly to the image and to the paper to completely color them yellow. 


From my blog, hop on over to Cibele Glazer's blog to continue the hop. 


Thanks for visiting, Linda (lbpost)

THANKS SO MUCH card

Materials list:
Cardstock – Core Expressions/Core’dinations
Curious Iridescent Cryogen White/CutCardStock.com
Patterned paper – Pariffin and Revitalize/Origins/BasicGrey
Button stamp – Pink Persimmon
Sentiment sticker - SRM
Black Versafine stamp pad
Fluid Chalk stamp pad
Clear embossing powder
Circle punch - Papershapers
Buttons – PaperTrey, Inc.
Self adhesive rhinestones – Queen & Co.

SKETCH 182 – SWEET, WONDERFUL, UNFORGETTABLE card

Materials:
Sunshine Yellow Flower Soft courtesy of Flower Soft
Tacky Glue – Aleene’s/Flower Soft
Cardstock - Core Expressions Core’dinations
Patterned paper – Ducks in a Row/October Afternoon
Cupcake stamp – Impression-Obsession
Black Versafine Stamp pad
Clear embossing powder – Stampendous
Copic markers
Self Adhesive Pearl – Queen & Co.
Loopy border punch – Martha Stewart
Machine sewing
Word stickers - Sticko
Sandpaper
Foam Tape – 3M

Saturday, August 28, 2010

Another day to play with an Unscripted Sketch! How does it get better?
I guess it got better for me when I used some new Jillibean Soup products with the sketch.  That brown, background cardstock is from the new Jillibean Soup Core Impressions by Core'dinations.  Those little flower circles are punched from one of the patterned papers.
The scallop circle piece is a Sprout, the colors match so perfectly as well as those mini brown letter stickers. 
***
Now for some MORE photos!
One of the cupcake stores we frequent had an anniversary party last weekend and of course, we had to go. This structure that was on display, filled with mini cupcakes is from their time on Cupcake Wars on TV.  Quite the royal way to show off some pretty cute little cupcakes.
Here is a close up of some of the pink layers of cupcakes. 

Part of the party was free cotton candy. This little guy was NOT a fan of that funny feeling stuff.
He wanted to get his face painted.  This was his first time for this kind of an experience. He would have helped the gal if he could have. He was so curious about her paints.
He was also beyond patient. He sat so still and let her work her magic.
He was so proud of his little froggie! Is this just too cute?

Thanks for visiting, Linda (lbpost)

SKETCH 70 – WISH…All Things card

Materials:
Cardstock – Core Impressions/Core’dinations
Patterned paper, Sprout, chipboard flower, mini sticker letters – Meatballs and Clove Fresh Garlic/Pasta Fagioli collection/Jillibean Soup
Self adhesive pearl – Queen & Co.
Circle punch- Marvy
Sandpaper
Foam tape – 3M

Tuesday, August 24, 2010

Summer/Winter

I like to create for all of the seasons so todays post is going to cover Summer and Winter. 

My first card goes along with the Card Positioning Systems sketch for this week. It is a fun sketch, as usual and what made it even more fun for me was using these amazing papers by Bo Bunny.  When I first saw this collection in my LSS, I wanted every single piece and that isn't always the case with a new collection for me.   Those little squares that are on the side are actually cut from one of the patterned papers.
Notice the little sparkle along the wave edges in the patterned paper? I added some Glitter 3-D Fashion Paint by Tulip.  This is the kind of paint that you get in the t-shirt decorating section. It works wonderfully on paper projects and I just love this glitter because it gives some sparkle and still lets the underneath pattern and color show through. The Splash Zone piece is cut from another piece of the patterned paper in this collection.

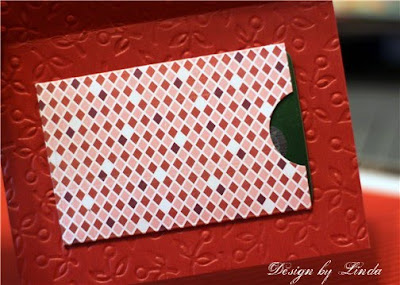
This little card fits with the Caarvarks blog challenge.  It is hosted by JustRite stamps.  My card is a mini card created to hold a little gift card inside.  Something that is always needed at Christmas. 
I love stamping with JustRite stamps. I love that you can change the borders and words to kind of make them your own.  I stamped this in green and then added accents with Copic Markers and some rhinestones.  Notice the cardstock too. That is Core'dinations Core Impressions. The embossed design is already in it.
Here is my little inside pocket.  A gift card just slips right inside. 
And a couple photos...
A couple more from one of our park visits.  Our grandson was on a walking adventure and it is so cute to watch him looking out for "BIG animals"!!!
Here he is trying to master some play equipment that is a bit too big for him.  It helps to have mom's help.
This one was more his size. Gotta love that cute face!
Thanks for visiting, Linda (lbpost)

SKETCH 181 – SPLASH ZONE card

Materials:
Cardstock - Core Expressions Core’dinations
Patterned paper – SunKissed Afternoon, Party and Chillin’/BoBunny
Self Adhesive rhinestones – Queen & Co.
Glitter 3-D Fashion paint - Tulip
Sandpaper
Foam Tape – 3M

JOY – GIFT CARD HOLDER card

Materials list:
Cardstock – Jenni Bowlin Core Impressions/Core’dinations
Patterned paper – Eskimo Kisses/BasicGrey
JustRite stamps
Green stamp pad – Memento
Clear embossing powder
Oval punch – McGill
Scallop oval punch – Marvy
Fiskars Apron Lace border punch
Ribbon
Self Adhesive Rhinestones – Mark Richards, Inc.
3D Foam squares – Scrapbook Adhesives by 3L
Sandpaper

Saturday, August 21, 2010

SRM, Colour Q and Unscripted Sketches, all in one post!

I so needed to fit in a couple challenges this week, so here they are. 

This first card fits the SRM Stickers sketch challenge and the colors go along with the Colour Q challenge.  This combines several things that I just plain LOVE!
I love the Core Impressions cardstock from Core'dinations, can you see that little embossed pattern in the cardstock for the card base?  I so enjoy using SRM stickers for the sentiment on my cards.  My favorite way to use them is to apply them to white cardstock that is the same shape as the sticker.  I can't get enough self adhesive pearls and rhinestones. 
And, I love to use border punches.  I am not real sure what I did before so many companies started introducing so many wonderful designs.  And, since this card fits the color challenge at Colour Q, I LOVE their color combos and the way they put them together. 

This next card goes along with the Unscripted Sketch #69 for this week.  I LOVE working with sketches so being part of that team is right down my alley. 
This week, a little added challenge to the sketch was to create something a little different for the flowers in the sketch so I created little pinwheels, something I had been wanting to try for awhile. They are so fast and I think so cute, especially with that double sided patterned paper. 
Remember I mentioned we went to our fair recently. I will say that, hands down, the deep fried Oreos win in my book for the best fair food!!! YUM!
Thanks for visiting, Linda (lbpost)

JUST FOR YOU card

Materials list:
Cardstock – Core Impressions/Cosmo Cricket/Core’dinations
Patterned paper and chipboard stickers – Cosmo Cricket
Sticker sentiment - SRM
Border punch – Fiskars and Martha Stewart
Self adhesive pearls – Mark Richards, Inc
Oval punches - McGill
Foam tape – 3M
Sandpaper

SKETCH 69 – WISH card

Materials:
Cardstock – Core Expressions/Core’dinations
Patterned paper – Quite Contrary/My Mind’s Eye
Corner rounder punch – Fiskars
Mini brads
Sticker letters – Making Memories
Sandpaper
Foam tape – 3M

Thursday, August 19, 2010

The little house and the purple grapes

Just wanted to share a couple projects today, no particular theme. 


I created this little card with lots of layers and add-ons to celebrate a new address or to send congrats on a new home.  The card base is Core'dinations, it has the embossed dots in it already.  I cut the card base in a simple house shape.  A couple layers of patterned paper with a punched edge gave me a cute roof and the grass is another piece of Core'dinations cardstock that already has that embossed design in it. I just freehand cut a grass look. 

This photo lets you get a better look at the card base and that great Core Impressions cardstock by Core'dinations.

Now for a layout.  Last fall I went on a little driving tour of an area where there are a lot of vineyards. I so enjoyed the drive and the look of the vineyards as fall is approaching. Can't wait to do that again. I created a very simple layout to remember some of my favorite photos.  This photos are actually 3 4"x6" photos.  In the two of the photos I just created a collage of two photos each so when I printed out the 4" x 6" photos, they really contained two images.  The title is printed from the computer on the white cardstock. 

Remember how much fun we were having with bubbles? Here is another example.

On a recent zoo trip, I caught this scene. Who do you think is directing who!?

Our youngest grandson was off on an "adventure" as he put it!!!

Thanks for visiting, Linda (lbpost)

Monday, August 16, 2010

Thank You's and the Fair

I am going to share my Unscripted Sketch card and my Card Positioning Systems card with you in today's post.  Both ended up being Thank You cards.  I am sure there are many themes that are very popular for cards, but it seems we need Thank You cards so often for so many reasons. 

This first card was created to go along with this weeks Unscripted Sketch #68.  I used some of my brand new Tree Love Papers and products by Nikki Sivils, Scrapbooker.  Most of the papers are from one of the mini pads.  That row of trees is part of one piece of paper.  The little tree is punched from the die cut page and the black sticker letters are from the same collection. I just love that Nikki decided to add sticker letters to her summer CHA release collections.   

The little tree has a coating of Aleene's Paper Glaze, that always adds just a bit of added interest.  BIG HINT here:  I wanted green pearls but I didn't have any. Guess what, I colored these with a Copic marker. Wowie did that work perfectly. 
This card goes along with the CPS sketch for this week.  LOVE these October Afternoon papers. 

That wonderful label is a stamp.  It is by Gina K.  I inked it with two shades of green Memento ink.  The sentiment is a sticker by SRM.  I love how many times their stickers are just what I need to finish a card. 
And now for a few photos:

We went to the fair this last week.  We had so much fun, mostly because we went with several of our grandkids and it is always great to see these things through their eyes.  This is one of our grandsons with his own grandstand view. 
This little guy could not get enough of the animals.  He had no fear at all, so he was truly fun to watch. 


He would have climbed into their cages with them if he could.  He also loved hearing the sounds each animal makes and he is so good at mimicing them.

Thanks for visiting, Linda (lbpost)

SKETCH 68 – THANK U card

Materials:
Cardstock – Core Expressions/Core’dinations
Patterned paper and sticker alphabet letters – Tree Love
Scallop circle punches – EK Success
Circle punches – Papershapers
Big brad
Self adhesive pearls – Recollections
Copic marker
Brown Fluid chalk stamp pad – Clearsnap
Clear Paper Glaze – Aleene’s®


SKETCH 180 – THANK YOU card

Materials:
Cardstock - Core Expressions Core’dinations
Patterned paper – October Afternoon
Label stamp – Gina K
Memento stamp pads
Clear embossing powder – Stampendous
Sentiment sticker – SRM
Scallop scissors – Family Treasures
Brads – Making Memories
Machine sewing
Sandpaper
Foam Tape – 3M

Wednesday, August 11, 2010

Flower Soft and Impression-Obsession stamps BLOG HOP


Yeah, a blog hop! What a fun way to share a whole ton of goodness.  Today's blog hop is with the Flower Soft Design Team and the Impression-Obsession stamps Design Team


As you make your way through the hop make sure you comment on each and every post. There will be 4 prize winners chosen randomly among the blogs.                          


Two $25 gift certificates from Flower Soft and two $25 gift certificates from Impression Obsession!!!

The prize winners will be announced on the Flower Soft Blog and The Impression Obsession blog on Wednesday August 18th.

If you didn’t start at the beginning of the hop please go to the beginning at the Flower Soft Blog.

I have already mentioned a few times how much fun it is to use Flower Soft on a project and today I am going to use some Ultra Fine Flower Soft with a super cute stamp from Impression-Obsession.The stamp I used is from a set called "Refreshments". Every stamp in this set is just beyond CUTE and fun to use.  My card also fits the Little Red Wagon challenge to create something with a SUMMER theme.

After I colored my image with Copic markers, I applied the Tacky Glue and then added the Citrus Crush Ultra Fine Flower Soft to my lemon slices.  I only added the Flower Soft to portions of the lemon slices.  I knew that if I completely covered them, that would hide the little images.  By just accenting portions of the image, you can still see what the image is plus get the neat effect of the Flower Soft.


On the Strawberry and on the little umbrellas, I added some Strawberry Ultra Fine Flower Soft.  Again, I didn't cover the entire image so that you could see the Flower Soft and still see the image. 
From my blog, be sure to progress onto the next blog in the hop, Kathy Menzies
Thanks for visiting, Linda (lbpost)

SWEET THINGS card

Materials list:
Citrus Crush and Strawberry/Ultra Fine Flower Soft
Tacky Glue – Aleene’s
Cardstock – Core Expressions/Core’dinations
Patterned paper – Cosmo Cricket
Versafine Black stamp pad
Clear embossing powder - Stampendous
Stamps – Refreshments/Impressions Obsession
Copic markers
Self adhesive rhinestones – Queen & Co.
Foam tape – 3M
Sandpaper

Tuesday, August 10, 2010

The color might say it all

First off, Pink Persimmon is offering a 15% off coupon - how can you beat that!? Just go to their site and sign up for the newsletter.  You will then receive the coupon. 
Now for my first card, I just had to use the color combo challenge at The Play Date Cafe.
I really want to go there!!! But in the meantime, I used the color combo to create a card.
I have wanted to use this adorable stamp set by My Favorite Things for awhile now and I thought that color combo was the perfect way to color my little guy on the swing. 

I, of course, needed to add a few more colors to create my little scene but I still have the golden yellow and that great deep red the focal point.  The blue background was created with a spray of Glimmer Mist.  The card base is Core Impressions by Core'dinations from the Jenni Bowlin collection.  I love this embossed pattern for a "boy" look.  I did add some Aleene's Paper Glaze to the leaves and the wood swing just to add a little extra interest to my image although it was hard to show you that in the photograph. 

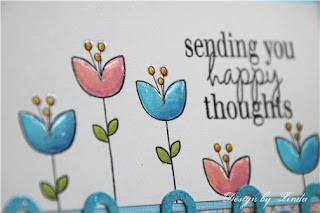
This card is my Card Positionin Systems card for this week. The sponsor is The Stamps of Life.  I loved using all of these pinks and blues to create a "girly" card with those cute flowers.  That loopy piece is cut from a piece of paper that started out 12" x 12". 

The flowers were colored with Copic markers and I added Aleene's Paper Glaze to each flower.  Isn't it neat the dimension that that glaze adds?

Thanks for visiting, Linda (lbpost)

SWINGING BY… card

Materials list:
Cardstock – Core Impressions/Jenni Bowlin/Core’dinations
Patterned paper – October Afternoon
Versafine Black stamp pad
Clear embossing powder – Stampendous
Stamps – My Favorite Things
Border punch – EK Success
Copic markers
Glimmer Mist spray – Tattered Angels
Clear Paper Glaze – Aleene’s®
Foam tape – 3M
Sandpaper

SKETCH 179 – HAPPY THOUGHTS card
Materials:
Stamps courtesy of The Stamps of Life (flowers and sentiment)
Cardstock - Core Expressions Core’dinations
Patterned paper – Olivia/BasicGrey
Loopy cut paper – KI Memories
Copic markers
Black Versafine stamp pad
Clear embossing powder - Stampendous
Sandpaper
Foam Tape – 3M
Clear Paper Glaze – Aleene’s®

Saturday, August 7, 2010

Guy stuff

Today's post seemed to end up being pretty "guy" related but that is OK. 
It was my turn to post at Nikki Sivils, Scrapbooker so go on over and take a peek at my entire post.  This layout is part of my post. I pulled out a previous released collection, Henry's Brilliance. I loved how well those patterns went with a boy related layout.  I also posted two cards so go see them, PLEASE!
I also want to share my Unscripted Sketch card with you.  The new Unscripted sketch and the teams cards always go up on Saturday.  Make sure you take the time to play along too since sketches are so fun to use.
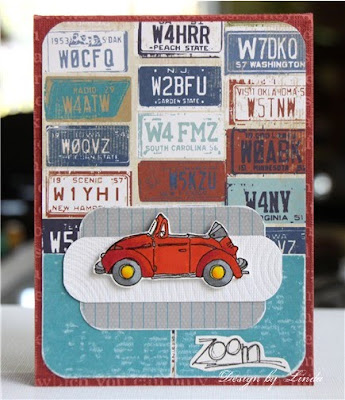
Is this little "bug" just the cutest? It is a stamp by Printworks. Of course, I colored it with Copic markers.  I was pretty amazed at how well the Little Yellow Bicycle travel related papers worked with the car.  It is hard to see but I added some Aleene's Paper Glaze to the little hubcaps!

Thanks for visiting, Linda (lbpost)

Unscripted sketch #67
Materials:
Cardstock - Core Impressions/Core'dinations
Patterned paper - Little Yellow Bicycle
Stamp - Printworks
Copic markers
Tim  Holtz embossing folder - Sizzix
Corner rounder punch - Fiskars
Aleene's Paper Glaze
Sandpaper