Monday, September 28, 2009

The Cat's Pajamas Blog Hop

It's a blog hop and I get to play!!! The Cat's Pajamas is releasing a new, clear stamp set called FRIGHT NIGHT and all of the participates in the blog hop will be using this set. (I get to play because I was a past Swanky Stamper winner)
Today's Haunted Hop includes a PRIZE giveaway!! Here's how you can win: You must leave a comment on each blog in the hop, for your chance to win this month's KITTY KAT PACK!! The Kitty Kat Pack will include:The Fright Night set, Hocus Pocus Buttons, Hocus Pocus Glitter Pack (like THIS one but spookier).
Alma will be choosing a random commenter and posting it to HER BLOG sometime on Friday, October 2nd. All of the details of this blog hop and the TCP challenge are at Susan's blog.
You possibly came to my blog from Tracy's blog. After you have looked over my creations, hop on over to Amy's blog.
I used the Card Patterns Sketch#33 from last week for my design. I love to use sketches, but maybe you know that already. I purchased these Halloween themed papers last year and I instantly knew I wanted to pull them out.
If you take a look at the Fright Night set of stamps, you will see that this great tree has a face in it. I wanted to use the adorable little owl on my tree and thought the face would be distracting so after I stamped the tree with the black ink and embossed it with clear embossing powder, I took a black, permanent pen and colored in the face parts. I quickly poured clear embossing powder on the ink and it was just wet enough to hold the powder.
Notice too that the black card is from the Black Magic collection by Core'dinations. I embossed part of it with a Cuttlebug embossing plate and then sanded the embossed area and the edges of the card to expose the core of the paper.
What would Halloween be without CANDY! And what would be even better then a little gift of candy to have for party favors or as a gift to co-workers. etc. I used an origami technique to create a little box from my patterned paper and two little candy bars just fit inside.
The candy bars are wrapped with black paper and tied with a black bow.
Another stamp in this Fright Night set is the little collection of Halloween candies. I took a piece of cardstock and stamped this little set a number of times to create my own patterned paper. I quickly colored the pieces in with Copic markers. I then sprayed my piece with a couple colors of Memories Mist spray. Next I used my tag punch and just punched out the tags to tie to my candy bars.
Remember, it's off to Amy's blog now.


Thanks for visiting, Linda (lbpost)

HAPPY HALLOWEEN card
Materials:Cardstock – Curious Iridescent Cryogen White/CutCardStock.com and Black Magic/Core’dinations
Patterned paper – Haunted:Ominous/Cosmo Cricket
Stamps – Fright Night/The Cat’s Pajamas
Versafine black stamp pad
Clear embossing powder
Copic markers
Cuttlebug embossing plate – Provo Craft
Corner rounder punch - Fiskars
Scallop circle punch – PaperShapers
Memories Mist spray – Stewart Superior
Foam tape – 3M

CANDY TREAT card
Materials:Cardstock – Curious Iridescent Cryogen White/CutCardStock.com
Patterned paper – Haunted:Ominous/Cosmo Cricket and BasicGrey
Stamps – Fright Night/The Cat’s Pajamas
Versafine black stamp pad
Clear embossing powder
Copic markers
Tag punch – McGill
Ribbon

Saturday, September 26, 2009

Inky Antics stamps and CPS

The sponsor for Card Positioning Systems blog for this week was Inky Antics stamps. I had two different sets to work with so my two cards are very different from each other. Both of the sets I used are clear stamps from the Fall/Winter 09 catalog.
I thought this cute turkey made for such a fun way to create a Thanksgiving themed card.
Take a special look at the coloring and accents on this turkey. I stamped the image with black, Versafine ink and embossed it with clear embossing powder on Cryogen Curious Iridescent white cardstock from CutCardStock.com. I like the way this paper works with Copic markers. BUT, first of all, I added color to this stamped image with alcohol inks. I dropped specific colors in specific places so that, in effect, I was coloring my image. I finished off the coloring with my Copic markers to add definition to the coloring. PLUS, I coated part of the turkeys feathers with Aleene's paper glaze. This adds a neat little bit of dimension.
Another interesting thing about my card is that I ran the card base through a Fiskars Paper Crimper. I ran it through a few times at different angles. Now, I sanded the paper which is from The Chocolate Box collection by Core'dinations and that exposed the core of that paper.
This card uses the same sketch, but the stamps are very different from the first set from Inky Antics.
The flower is a two step process and the set has several choices to make different styles of flowers. I did stamp the flowers on a patterned paper by October Afternoon. The white dots on the flowers is Fashion Bead paint by Tulip. The card base is a cardstock from the Black Magic collection by Core'dinations. When I sanded the edges of the card and the punched borders and that exposed the core to the paper. Notice too that the card is turquoise on the inside, while black on the outside.

Thanks for visiting, Linda (lbpost)

SKETCH 135 – EAT DESSERT FIRST card
Materials:
Clear stamp set – Goobles Turkey Clear set/Inky Antics
Cardstock – The Chocolate box and Core Essentials/Core’dinations and Cryogen Curious Iridescent/CutCardStock.com
Patterned paper – Farmhouse and Root Cellar/Farm Fresh/October Afternoon
Versafine black stamp pad
Clear embossing powder
Copic Markers
Alcohol Inks and blending solution – Ranger
Corner rounder punch – Papershapers
Mini brads
Paper Crimper – Fiskars
Chalk stamp pads - Clearsnap
Clear Paper Glaze – Aleene’s®
Tonic Paper Distesser
Sandpaper

SKETCH 135b CELEBRATE card
Designer: Linda Beeson
Materials:
Clear stamp set – Marvelous Match Ups Clear set/Inky Antics
Cardstock – Cryogen Curious Iridescent/CutCardStock.com and Black Magic/Core’dinations
Patterned paper – Report Card/Science Fair/October Afternoon
Versafine black stamp pad
ColorBox stamp pad - Clearsnap
Corner rounder punch – Fiskars
Apron Lace border punch – Fiskars
White Bead Fashion paint - Tulip
Sandpaper
Rub-on greeting – Making Memories

Wednesday, September 23, 2009

Autumn colors

Fall is supposed to be here although we haven't found it yet around here. That isn't unusual in Southern California. I like to pull out the fall colors though for creating cards.
I saw someone use this PaperTrey, Inc. set of flower stamps recently on their blog and it was one of those things where I knew I NEEDED that set NOW! I just love this flower, here I used two sizes.
The sentiment is also by PaperTrey, Inc and I cut a label using a Spellbinders Shapeabilities. I love these because it cuts the shape and then you can also emboss it. I colored this while the die was still in place.
Most of my coloring is done with a couple colors of Memories Mist sprays by Stewart Superior. I love these sprays because the mist is fine and the colors are so strong. I then added in some colors with Copic Markers and the white tips of the flowers are colored with a white pencil. I added dots for accent with Tulip Fahion Bead Paint.
I wanted to use more of my Jillibean Soup papers and other supplies. I used a cardstock from The Chocolate Box collection by Core'dinations. You really would think that Core'dinations made this cardstock just for these Jillibean Soup papers, they go together so wonderfully. I made the side, score lines with a Scor-Pal and then sanded them. You can then see that great, green core to the brown paper.

I used a Cuttlebug embossing plate on the beige cardstock and then cut the label shape from a label that I saved for a pattern.
Thanks for visiting, Linda (lbpost)

ONE OF A KIND card
Materials:
Cardstock – The Chocolate Box and Core Essentials/Core’dinations
Flower and sentiment stamps – PaperTreyInc.
Black Versafine stamp pad
Clear embossing powder
Copic Markers
Memories Mist spray – Stewart Superior
Spellbinders Nestabilities label die
Ribbon
Tulip Bead Paint
Fiskars Corner rounder punch
Sandpaper


AUTUMN card
Materials:
Cardstock – The Chocolate Box/Core’dinations

Patterned papers, Ric Rac and Journaling Sprouts – Lentil Soup/Jillibean
Cuttlebug embossing plate
Scor-Pal tool
Chalk stamp pad - Powder Puff/Quick Quotes
Rub-on greeting – Making Memories
Brad
Sandpaper

Sunday, September 20, 2009

Winner, JustRite Stamps and CPS

DRUMROLL.....My winner of some brand new Pink Persimmon stamps is Gini Cagle poster #63. I have already contacted her and she can be on the lookout for some stamping goodness. Thanks so much for everyone who visited.
*******
I think there were lots of you who enjoyed the JustRite Stamps blog hop this week and if you want more JustRite goodness, keep watching the Card Postioning Systems blog this week as the team plays with Holiday themed goodness. I used a stamp from the Christmas Treasures collection. This set has several borders and several stamp images to use in the middle of the borders. The neat thing about these is that they are totally mix and match and everything can also be used alone so this frame can just be stamped and used for another theme or to hold your journaling, etc.
I am madly in love with Copic markers and so it was fun to pull out several to color in this image. I used Cryogen White Curious Iridescent cardstock for my stamping. I really love using that with the Copics and when you are finished with the coloring, the resulting image has a slight sparkle to it. (This cardstock is available at CutCardStock.com)
Notice the black circle piece behind the colored and stamped piece. That is the new Jenni Bowlin Core'dinations cardstock. The text is already embossed into the cardstock and some slight sanding exposes the core color and the text.
Another really neat advantage of using any of the cardstocks from the Black Magic collection of Core'dinations is that the top side of the card is black and the inside of the card is the color of the core you picked to use. In this case, the core is beige and so that is the inside color of my card and when I sanded all of the outside edges of the card, you also see the tan core.
Thanks for visiting, Linda (lbpost)

SKETCH 134 – SILENT NIGHT-HOLY NIGHT card
Materials:
3 ¼” Diameter Christmas Treasures stamps courtesy of JustRite stamps
Cardstock – Black Magic, Jenni Bowlin and Core Essentials/Core’dinations
Patterned paper – Black Finial/Jenni Bowlin
Versafine black stamp pad
Clear embossing powder
Copic Markers
Snowflake punches – Martha Stewart
Circle punches - Papershapers
Circle template – Coluzzle
Machine sewing
Fluid Chalk stamp pads – Clearsnap
Sandpaper
Self adhesive rhinestone – Mark Richards, Inc.

Friday, September 18, 2009

A Sketch of this - A Sketch of that

Yes, you guessed it, more cards created from sketches!
The first one uses the sketch from this last week from Unscripted Sketches #23.
Just sitting on my scrapping desk were these Scenic Route papers wanting to be used. I love red anyway, so I had to figure out how to use them for this card. And, I seem to want to use the notebook prints on everything.
I love the Nestabilities. I love the two steps, the one that cuts the shape and the other that gives an embossed line. I think they look so neat when they are done. I left the die in place while I lightly tapped it with a chalk stamp pad. This added just a bit of shading to the shape.
I also just plain LOVE this Loopy border punch and I thought it made for a great side accent to go along with the sketch. Notice the Core'dinations cardstock. Even with this great tan paper, when the edges are sanded, the core is exposed.
This card puts to use the 2 Sketches 4 You sketch #35 for this last week. More papers that were just sitting on my desk wanting to be used are these great papers by Jenni Bowlin. I so love the black and cream papers in this collection.
The chipboard piece is by Tattered Angels and I colored it by spraying it with a few colors of Glimmer Mist. Such a fast and easy way to color my piece.

Notice two things here, the scallop piece is the new Embossed Jenni Bowlin Core'dinations and the card base is a piece of Black Magic. It is black on the top side and a great tan on the reverse side. When this is sanded, the tan core is exposed and what I really love is that you can have a black card with a lighter color on the inside for your greeting.
Thanks for visiting, Linda (lbpost)

ADORE YOU card
Materials:
Cardstock –Black Magic and Jenni Bowlin cardstock/Core’dinations

Patterned paper – Vintage Black Branch, Black Micro Dot and Black Finial/Jenni Bowlin
Rub-on letters – Jenni Bowlin
Chipboard shape and spray – Glimmer Mist/Tattered Angels
Fluid chalk stamp pads – Clearsnap
Border punch – EK Success
Self adhesive rhinestones – Mark Richards
Sandpaper

GIGGLE card
Materials:Cardstock – Core’dinations
Patterned paper – Scenic Route
Rub-on word – Scenic Route
Loopy border punch – Martha Stewart
Label die – Nestabilities/Spellbinder
Corner rounder punch – Bind It All
Chalk stamp pads – Powder Puff/Quick Quotes
Sandpaper
Machine sewing
Tonic Paper Distresser

More of the JustRite Stamps Blog Hop

The blog hop with JustRite Stamps continues today with another list of designers ready to show off the use of the "FONTS". Be sure to start at JustRite Stamps blog for the new list. I wanted to show you a few things that I had created in the past using alphabet stamps from JustRite Stamps. The cards have been posted here before, but I thought you might like a refresher course on these ideas.
It is just as simple as one letter to create a Monogram card that is so personal. It is also the perfect format for creating a gift set of cards for someone. Don't you just love that Sassafras Lass paper that has that great scallop border to it?
This is another card that uses the idea of either a birth announcement card or a card for a new baby or a shower. This card was published in CARDS awhile back. Do you see the subtle dot circles that are stamped on the background paper? This is one of JustRite's border stamps. The little lion is a stamp by Hero Arts.
While I had all of the stamps in place on the stamper, I stamped extra ones and this just seemed like the perfect accent for a layout celebrating the new addition to our family. I mentioned yesterday that once you have these words all set up you can stamp it as many times as you want making duplicate cards so easy.
Remember this blog hop has a great BLOG CANDY give away and a sale.
Thanks for visiting, Linda (lbpost)

Thursday, September 17, 2009

The JustRite Stamps Blog Hop

And there is a sale and BLOG CANDY - Check out JustRite Stamps blog for that info.
I sure hope you are ready for some serious fun because JustRite Stamps and a whole crew of stampers are going to be bringing you some "FONT" goodness using JustRite stamps and a Blog Hop. JustRite Stamps offer several styles of fonts and these also come in various sizes so today and tomorrow you are going to get a big glimpse as to just what can be done with "FONTS"!
I just love that with these teeny tiny alphabet letters you can pretty much say anything you want to. The really cool thing is that once you have the letters set up on the stamper, you can stamp this same message as many times as you need. My example is a baby announcement and you might have a whole pile of these you need to make. This is a great way to offer something very personalized. This can also be a card to welcome the new little one.
Notice how I used the Core'dinations cardstocks for the punched border and that great, embossed design.
One of the simplest ways to use alphabet letters is to create a card or set of cards adding a Monogram or Initial. This only takes one letter and you have something that is very personal and specific to the recipient.
The ornate border around the letter is also by JustRite stamps. They offer a whole lot of different borders. I did stamp mine and emboss it with silver embossing powder. The black/brown cardstock on my card is the new Jenni Bowlin Core'dinations cardstock. I only had to sand this piece to bring out that great design. That and the silver Monogram make for a rather elegant card.
Now remember there are a number of designers participating today.
Go to JustRite Stamps blog for the links to the list of the blogs you can visit today for more "FONT" goodness.
AND BLOG CANDY!
Jenny Gropp is the next person on the list or go back to JustRite Stamps blog
Thanks for visiting, Linda (lbpost)
SNIPS AND SNAILS card
Materials:
Cardstock – Core Essentials/Core’dinations
Patterned paper – South Forty/Farm Fresh/October Afternoon
Alphabet letter stamps and round stamper – JustRite Stamps
Black Versafine stamp pad
Cuttlebug embossing plate
Border punch – Martha Stewart
Sandpaper
Twine
Scallop circle punch – Marvy
Corner rounder punch – Fiskars

ELEGANT MONOGRAM “B” card
Materials:
Cardstock – Black Magic and Core Essentials/Core’dinations
Watermark stamp pad – Clearsnap
Silver embossing powder
Monogram and elegant border stamp – JustRite Stamps
Self adhesive pearls – Kaiser Crafts
Scallop circle punches – Marvy and PaperShapers
Cuttlebug embossing plate
Sandpaper
Foam tape – 3M

Tuesday, September 15, 2009

My new most favorite color - PINK!


I can finally tell my exciting news, I get to be on the Creative Team for Pink Persimmon clear cling stamps.

There is good news for you too. Everyone that leaves a comment on my blog letting me know what you favorite Pink Persimmon stamp is will be entered into a drawing to win a stamp set. Now don't just leave a comment on my blog because there will be a winner drawn from each of the CT members blogs. Leave you comment by Saturday, Sept 19th. Your comments have to be in by 8:00 am that morning.

Oh, I think my favorite is their adorable alphabet set, mostly the lower case one. You are probably going to see a whole lot of that one from me in the next few months. The Vintage Cupcake set is next on my list of favs!


The other team members:

Kimberly Crawford

Julie Detlef

Samantha Sibbet

Kelly Schirmer

Kristie Larsen

Monday, September 14, 2009

It is ZVA goodness time at CPS

******
Can I be excited about the sponsor for this week at Card Positioning Systems blog? Maybe you have never heard of Zva Creative but be watching all week long as the CPS blog posts the creations from the DT using these amazing products. Another word for this goodness is "bling"! I just had to create two cards using the Zva Creative products so here they are.
This card is made up of Core'dinations cardstock and some great, Little Yellow Bicycle products accented with some amazing Zva Creative self adhesive pearl flourishes.
When someone first invented "self adhesive" rhinestones and pearls, I was instantly in love. The next step came with these amazing "strings" of self adhesive goodness.
One thing to note is that you don't have to use these flourishes and designs just as they are, they are so easy to snip here and there to customize your use. For this card, I used two flourishes with white self adhesive pearls and then I snipped off a few pearls from another piece to create the little "c" shape of pearls to make a finished end on each flourish.
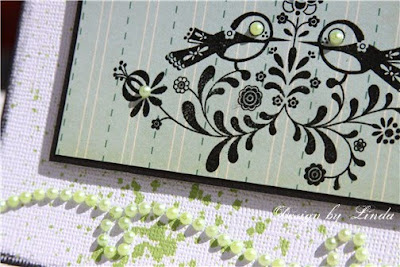
This goodness also comes in colors and I really wanted to show off these neat green sets of flourishes.
I accented the card with a green Glimmer Mist and I sniped off individual pearls to accent my stamped image.
Thanks for visiting, Linda (lbpost)

SKETCH 133 – WITH ALL MY HEART card
Materials:
Self Adhesive pearls courtesy of Zva Creative
Cardstock - Core Essentials/Core’dinations
Black stamp pad – Versafine and Fluid Chalk/Clearsnap
Stamp – BasicGrey
Rub-on sentiment – Making Memories
Glimmer Mist spray – Tattered Angels
Patterned paper – Cosmo Cricket

SKETCH 133 – WISH card
Materials:
Self Adhesive pearls courtesy of Zva Creative
Cardstock - Core Essentials/Core’dinations
Patterned paper, label and word, WISH – Little Yellow Bicycle
Stamp pad – Powder Puff/Quick Quotes
Mini black brads
Sandpaper
Corner rounder punch - Fiskars

Sunday, September 13, 2009

Guess what we did yesterday!

I created a little collage to tell part of our story! This is the first time our grandson wore these adorable little boots and of course, I had to also give him the hose with the water running just a little bit. This will entertain him forever! Who knows why he thought he needed to go UNDER the horse but one of his new favorite words is "stuck"! He used it several times in the coarse of the day and he knows what it means!
Thanks for visiting, Linda (lbpost)

Friday, September 11, 2009

Cuttlebug Goodness and 2 Sketches 4 You

This just in........go to CutCardStock.com and take a peek at some creations of mine they posted using Core'dinations cardstock and enter to WIN a $25 gift certificate to buy some of your own cardstock!!! This is important!
*****
I just received a nice package in the mail with some NEW Cuttlebug embossing plates. These tools are one of those kinds of things you can collect and you want ALL of them! The good thing is that I love to use them so they don't just collect dust.
The Cuttlebug Challenge Blog has a challenge to create invitations so here is mine and I used Caarvark sketch #2 to design it. It has a slight masculine feel with that particular embossing plate and the colors. But I think what was in my mind was that the "Over the Hill" theme usually has a gloom kind of feel to it so the black works for that.
The Core'dinations cardstock I used for the black portion is from the Vintage collection. Didn't that work way too cool with that embossing plate? I cut the letters for "50" from that same embossed piece. The red, scallop circle piece is the new Jenni Bowlin Core'dinations. The text design is already embossed into the paper and you just sand it.
This card represents the 2 Sketches 4 You sketch #34 and yes, another one of my brand new Cuttlebug embossing plates. Isn't it amazing how that embossed pattern goes with the blue, patterned paper?
The entire image is a $1 stamp from Inkadinkado. I tend to collect these things without using them because why wouldn't you buy a stamp that is only $1! It was fun to dig into that stash and find one to use. I wanted to color it with my Copic markers to match the papers in this BasicGrey collection.
The last tidbit to point out on this card is that orange embossed little strip of cardstock. 2 Sketches 4 You is highlighting the mini Scor-It tool and so I used that to create my embossed lines along the strip that I cut. I just sanded that and the Core was then exposed in the Core'dinations cardstock.
*****
Can you stand another photo from our beach trip!? What is fun is how afraid he was of the ocean when we first arrived. He got over that rather quickly.
Thanks for visiting, Linda (lbpost)
50 OVER THE HILL card
Materials:
Cardstock – Jenni Bowlin collection and Vintage/Core’dinations
Patterned paper – Scenic Route
Apron Lace border punch – Fiskars
Cuttlebug Embossing plate – Provo Craft
Mini stickers
Scallop circle punch – Marvy
Sandpaper

TODAY IS A GOOD DAY card
Materials:
Cardstock – Core Essentials/Core’dinations
Patterned paper – BasicGrey
Flower grouping stamp - Inkadinkado
Black Versafine stamp pad
Clear embossing powder
Copic markers
Self adhesive pearls – Kaiser Crafts
Corner rounder punch – Bind It All
Cuttlebug Embossing plate
Sandpaper
Circle template – Coluzzle
Scallop scissors – Family Treasures
Score It tool

Wednesday, September 9, 2009

From the Kitchen Sink!

You might know that I love working with Core'dinations cardstock. One of the things that sets this cardstock aside from other kinds is the Core. It is so much fun to try to figure out ways to show off that Core. Get ready for the unexpected with this layout.
This cutie is the adorable little girl of one of my nieces. This angelic pose just needed something special to really highlight it.
Now, take a good look. The lines in the Whitewash cardstock were created by placing the piece of cardstock over a cooling rack like what you would cool a cake layer on and sanding where the rungs are. I used a broad, fingernail file. I like the control I can get with a fingernail file. It lets me zero in on specific spots. I just kept moving the cooling rack around the outside edges of my paper to get this "line" accent all around the outside edge.
I love this My Mind's Eye paper, especially the shaped piece. I just used a portion of that piece and I used that cut edge to cut that same shape along the bottom edge of the Whitewash, sanded piece.
My little flowers are also Core'dinations cardstock. I punched them with a few different flower punches and slightly sanded them. Notice too, the Fiskars Apron Lace border punched border.
Thanks for visiting, Linda (lbpost)
SUGAR layout
Materials:
Cardstock – Whitewash and Core Essentials/Core’dinations
Patterned paper – My Mind’s Eye
Sticker letters - Thickers/American Crafts
Flower punches – PaperShapers
Self Adhesive pearls – Mark Richards, Inc
Cake Cooling rack
Sandpaper
Apron Lace border punch – Fiskars


Monday, September 7, 2009

CPS #132 and the Beach

This just in....Core'dinations cardstock and it is on sale here!!! Hurry!
The sponsor at Card Postioning Systems blog for this week is Sweet n Sassy and their selection of Digital stamps. I picked a set of flowers.
I printed the stamps out on this pink patterned paper by BasicGrey. The stamp is actually a branch of flowers but I cut out some of them so that they would fit the sketch.
So I didn't have to color the flowers at all because of the paper they were printed on. You can also see the spray of Glimmer Mist on the entire card. That seemed to help everything on the card fit together well.
*******
Do you want to see what we did today, the holiday? We have had such warm weather. Actually HOT for several days but today is better. The thing is, it made for an absolutely perfect day to go to the beach for a little bit. What is better then getting to play in the waves and digging in the sand.
The waves were unusually neat today. Some were very big and it seemed like there were more of them. Just ask all of the surfers that were out there.
Thanks for visiting, Linda (lbpost)

SKETCH 132 – REMEMBER card
Materials:
Cardstock - Core Essentials/Core’dinations
Digital stamp – Digis for a cause/Courtesy of Sweet n Sassy
BasicGrey patterned papers
Metallic brads – Creative Impressions
Corner rounder punch – Bind It All
Glimmer Mist
Sandpaper