Showing posts with label Plaid. Show all posts

Saturday, September 11, 2010

Girly stuff, rhinestones, pearls and flowers!

Sunday is the day that my project is up for all to see at the Pink Persimmon blog for PLAID week. Be sure to check out all of the details but I will give you a peek here.  Plus, remember that you can win prizes too.

I used one of my absolute favorite stamps, this super cute Scottie Dog and created a little painted purse around her. 
  
                       
Here is a close up of the amazing Glitter Paint that I used from PLAID.  I gave the wooden purse a coat of a blue paint first and then painted over that with the Folk Art Glitter Paint. LOVE the amount of glitter look without loose glitter falling off.  Check out the Pink Persimmon blog for a full photo and details for winning a prize.  So GO THERE, PLEASE!

Plus, I want to share my Unscripted sketch card for this week with you. It might be one of my favs!!!
I just picked up a set of clear stamps by Me & My Big Ideas at Joann's store and so of course, I had to pull them out. The label and the border stamp are from that set.  The flowers are another one of my newest purchases, they are by Recollections at Michaels craft store. They come in several different color schemes, I will probably NEED more!
The border stamp is from that set and I accented it with Queen & Co.'s self adhesive pearls. Let me tell you, you NEED these pearls and their rhinestones in every color, they are so handy and the colors are just plain YUM!
Thanks for visiting, Linda (lbpost)

SKETCH 72 – BLESSING card

Materials:
Cardstock – Core Essentials/Core’dinations
Patterned paper – Meadowlark/My Mind’s Eye
Label and decorative border stamp – Me & My Big Ideas
Fluid chalk stamp pad - Clearsnap
Black Versafine stamp pad
Clear embossing powder
Epoxy word – Heidi Grace
Self adhesive pearls – Queen & Co.
Flowers – Recollections
Ruffled seam binding – Etsy store
Sandpaper

Monday, July 27, 2009

Cuttlebug Challenge and Disney Pics

I have to say that my two most used tools are any of my embossing plates that I use in my Cuttlebug machine and all of my border punches. I could literally use both of these on every single thing I create!!! I have to make myself use other things now and then. The Cuttlebug Challenge Blog challenge for this week is to use a Cuttlebug embossing plate on an altered project. I use my embossing plates so much but I have never participated in one of their challenges before. Core'dinations cardstocks were just created to be use with the embossing plates so putting together this fun little box was easy.
I used one of the Black Magic papers that has a green core. I just ran pieces through the Cuttlebug with this embossing plate and then sanded the papers. I attached my papers to the little box with Mod Podge by Plaid and then I also coated all of the box with that same Mod Podge. I just love the shiny look this gives these great papers. I created my little flower top by tearing circles from my scraps. I did paint my box with black paint first so that my box looked very finished after the papers were glued in place.
********
Now, on to what we did last week. It was my granddaughters 12th birthday on Thursday and she could get into Disneyland for free on her birthday so I tagged along with my daughter, my grandson, my granddaughter and my youngest daughter drove down to enjoy the day with us. It was hot and we were sweaty but that didn't stop the fun of sharing this magic place with kids!
This huge statue is just outside the Disneyland Hotel. This was our first stop for breakfast at Goofy's Kitchen. What better way to start your birthday?
And, yes, Goofy needed to stop to give hugs. Let me tell you that Dathan was just not very sure of these big, furry creatures!!! He did give Goofy a high five though.
Do you see those little eyes peeking out from under that big steering wheel? It is always fun to stop for photo ops at the various, fun, cars in Toon Town.
As the sun was going down, I managed to get a few pics of the castle. We did get to watch the fireworks later but it was almost impossible to get a good view with the HUGE number of people all trying to do the same thing.
Since we drove down the day ahead, we had some time to get in the hotel pool. This was our grandsons first time in a pool and while he wasn't sure about this at first, you can see he warmed up to the idea.
Thanks for visiting, Linda (lbpost)

Wednesday, February 11, 2009

2 Sketches 4 You and snow pics

So, since I love sketches, I thought I should play with Laura's Sketch #19 at 2 Sketches 4 You blog for this week plus I just received a package this week from Cornish Heritage Farms and this gave me a great reason to try out one of the stamps. I used a tree stamp by Kim Hughes from the Spring Trees set.
I stamped the tree with Versafine black ink and then colored it with Copic Markers. The middles of the flowers are dots of Pearl White Metallic Fabric Dimensional Paint by FolkArt/Plaid. The card base is Bazzill's embossed dot paper and I am SOOOOO loving what a cool card that makes.

My husband and I were able to drive through a good portion of Oregon in January and so we drove up to Mt. Ashland the day after a snow fall and I just have to share a few photos that I took. Let me tell you I took a million since I live in Southern California and snow is never part of our everyday life! Plus I just had to give my NEW Canon 50D a good try out!


In the photo below, the sun was out and so the snow was falling off of the trees and it looked just like it was snowing right then. I was able to catch that "fall" of snow.


Thanks for visiting, Linda (lbpost)


HUGS – FLOWERED TREE card

Materials list:
Cardstock – Bazzill dots
Patterned paper – BasicGrey
Tree and hugs stamp – Cornish Heritage Farms stamps
Copic Markers
Pearl White Fabric Dimensional Paint – FolkArt/Plaid
Ribbon – Stampin’ Up
3M foam tape

Wednesday, January 7, 2009

Smile and the World Smiles With You!!!

At least that is what this little guy thinks!!! He has so many people in his life that he pretty much thinks it is always party time. You can see from this HUGE smile that he loves it!
And I wanted to share a card with you - a rather different card.
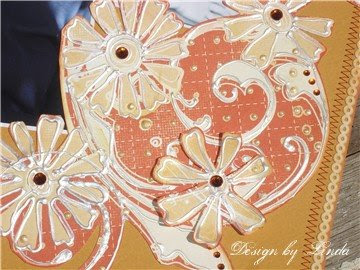
I used a piece of plastic by Plaid that you would normally purchase to cut your own stencils with. It is a great weight, it is slightly cloudy and makes for a fun card.
I used Queen & Co. felt and glued that to the front of the plastic. Some of their felts are self-adhesive, this particular one is one of their first releases of felt and it required me adding glue but that was actually very easy. I added a couple different sizes of rhinestones to the middles of some of the flowers.
I used a completely separate piece of patterned paper to create a liner for my card. The pattern can be slightly seen through the cloudy plastic front and with the particular paper I used, it has another pattern on the reverse side so it made for a fun inside of the card. A line of glue tape along the top, back of the liner is enough to attach it to the outside card. This was finished with a simple rub-on phrase.
Thanks for visiting, Linda (lbpost)
WITH ALL MY HEART card
Materials:Plastic – Stencil plastic/Plaid
Patterned paper – Roxie Cliques/Love, Elsie/KI Memories
Rub-on phrase- Making Memories
Corner rounder punch – Papershapers/EK Success
Felt Flower ribbon – Queen & Co.
Rhinestones – Hero Arts
Ribbon

Wednesday, December 10, 2008

CPS #94 and 2 Sketches 4 You cards

I am having way too much fun creating Christmas or Winter themed cards!!! I stayed with that theme this week for both my Card Positioning Systems card and Kazan's Sketch #15 at 2 Sketches 4 You card. I have said this before, but I just love the jumping off place that sketches give for creating. Sometimes it is fun to just get a bit of inspiration for your creations from a sketch, sometimes it is fun to follow the sketch very closely. I love the little wave look at the bottom of the sketch so I took that literal and handcut a couple wave shaped pieces from plain white cardstock. The fun thing here was that I then painted them with this Glitter Dimensional Paint. You get a great amount of sparkle and it is easy to apply.
I hope you can see it here - look very closely. Do you see the "dimension" of the rub-on bird piece? It is just so cool. These rub-ons are "thick" or "dimensional". They really make a stunning addition to a card. I found this set at Michaels in the Christmas supplies.
For this card, I combined a couple things, my I Am A Scrapaholic kit for December and the 2 Sketches 4 You sketch. I also got in my brand new Distress Stickles by Ranger!!! OHHHHH what a wonderful color - Broken China.
The snowflake piece is a Glimmer chip by Tattered Angels. It comes with a soft silver look but I also sprayed it with Silver Glimmer Mist for some additional sparkle and accents from my new Stickles.


Thanks for visiting, Linda (lbpost)


SNOWY BIRDS card
Materials:
Cardstock – Core’dinations
Patterned paper – Christmas Is/Cloud Nine/Fiskars (2 sided)
Bird rub-ons – Royal Brush/Royal and Langnickel
Glitter Dimensional paint – Plaid
Snowflake punch – Papershapers/EK Success


SILVER SNOWFLAKE card
Materials list:
Cardstock – Core’dinations
Patterned paper – Heidi Swapp
Broken China Stickles – Ranger
Snowflake piece – Tattered Angels
Ribbon – Michaels
Silver Glimmer Mist – Tattered Angels

Tuesday, November 25, 2008

Setting the Thanksgiving Table

Decorated Pumpkin Placecards
There are so many ideas for cute placecards for a decorated table at Thanksgiving. These little decorated pumpkins are easy to create and make for a fun table decoration. I found these are a local craft store. They are small, lightweight, artificial pumpkins that are about 2-3" across.

1. One of my pumpkins was covered with pieces of patterned paper that were glued to the pumpkin with Mod Podge.

2. Two of the pumpkins that I have pictured here were painted with metallic paint, one a copper and one a brown/burgandy.

3. When these were dry, they were all painted with Sparkle Mod Podge by Plaid. If you haven't used this stuff, you need to pick some up on your next trip to the craft store. It is a great way to add some "bling"!

4. The felt leaves are by Queen & Co. I just cut one leaf for each pumpkin. The felt is self-adhesive, so I placed each leaf on a piece of green cardstock and then cut around each one. A long, straight pin was placed between the felt layer and the cardstock layer. The head of the straight pin was cut off first and then each one was bent at the stem of the leaf so that it could be pushed into the pumpkin.

5. The name tags were created and a hole was punched in each one. The straight pin was placed through the hole in the tag before it was pushed into the pumpkin. The material of my little pumpkins was rather soft but I did poke a preliminary hole with my paper piercer first. A dab of glue was put on the end of the straight pin that was going into the pumpkin.


Thanks for visiting, Linda (lbpost)

Thursday, November 13, 2008

CPS #90 and 2 Sketches 4 You cards

Yes, I got in an early start to Christmas with this weeks Card Positioning Systems Blog card. And my color scheme is a little "out of the box" too.
It was fun to combine a couple patterned papers from the Irresistible collection by Quick Quotes papers for this.
One of my absolute products right now is this yummy, green glitter by Clearsnap. LOVE this green and I want to use it on everything! So green snowflakes might not be very traditional but I think it works!!! I used Plaid's, Liquid Embossing Finish first and then sprinkled a generous amount of glitter over that. One thing about using this kind of liquid for my glue is that it is dimensional.
And, again, I love to use sketches so it is just a natural to want to follow the current 2 Sketches 4 You sketch, Kazan's sketch #13.
I so love this bright yellow lace paper and pairing it with this great blue patterned paper was fun. The butterfly is a 2 step Cuttlebug die. One step cuts the butterfly shape and then there are four choices of embossing plates that fit perfectly. The embossed design on the butterfly was accented by rubbing with a Powder Puff Chalk stamp pad by Quick Quotes. I also stamped a "writing" stamp with the same blue stamp pad over the yellow letters to make the pieces go together a little more.
Thanks for visiting, Linda (lbpost)
SKETCH 90 – JOY card
Materials:
Cardstock
Patterned paper and Joy label – Irresistible/Quick Quotes
Snowflake punch and scallop border punch – Martha Stewart
Green Glitter – Clearsnap
All Night Media Liquid Embossing Finish and Metallic Dimensional paint– Plaid
Rub-on word – Christmas – Making Memories
YOU’RE ONE IN A MILLION card
Materials list:
Solid Cardstock
Patterned Paper – Quick Quotes
Yellow Alphabet Lace paper – KI Memories
Blue Hawaiian Powder Puff Chalk ink – Quick Quotes
Writing stamp – Hero Arts
Scallop border punch – Martha Stewart
Butterfly die and embossing plate – Cuttlebug/Provo Craft
Rub-on greeting – Melissa Frances
Rhinestones – Mark Richards, Inc.

Thursday, November 6, 2008

Another CPS #89 - Starving Artistamps, Inc.

Well, I love a challenge. So while my stamps were out from the CPS sponsor this week, Starving Artistamps, Inc., I just had to create another card. I used the same two stamps that I had for the other card, the circle background stamp and the Asters. This time I used a completely different color scheme, trying to mix it up a little.
For the middles of the flowers, I put a big drop of Liquid Embossing Fluid by All Night Media and sprinkled USArtquest's mica flakes over that. These flakes have a sparkle but it is hard to see it here. The Liquid Embossing Fluid is similar to Diamond Glaze or Aleene's Paper Glaze.
Thanks for visiting, Linda (lbpost)

CONGRATS card
Materials:
Stamps courtesy of Starving Artistamps – Mini Circle Background and Large Silhouette Asters
Cardstock
Patterned paper – October Afternoon and Bo Bunny Press
Memento stamp pads
Corner rounder punch – Papershapers/EK Success
Sand paper
Liquid Embossing finish – Plaid
Mica flakes – USArtquest
Rub-on greeting – Making Memories

Tuesday, November 4, 2008

CPS #89 and 2 Sketches 4 You

This week, Starving Artistamps was the sponsor at Card Postioning Systems blog. We don't always have a sponsor but one thing that is fun about having these great companies partnering with us is the challenge that comes with using their products. My card represents two stamps, a circle background stamp and the Aster stamp.
I used a stamp pad to slightly add color to my paper and then I stamped the circle stamp with a coodinating color of ink. For my centerpiece, I stamped the asters in black ink and embossed that and then cut the flowers out, adding them to my card with foam tape. I always think the dimension is a great accent.
And, I of course, had to play with Laura's Sketch #12 at 2 Sketches 4 You sketch. I also have to congratulate the new team members over there. So sad to see the past team go because every week they were amazing, but I'm guessing this new group will be every bit as amazing and inspiring.
For my two accent pieces, I punched out a circle from white cardstock and then punched "out" the butterfly in each circle. I coated the two butterflies with the Liquid Embossing Finish and then added the butterflies back into their space with foam tape so that I had some added dimension.
Thank you for visiting, Linda (lbpost)
I have another CPS card to show you later this week using the Starving Artistamps stamps

BLACK ASTERS card
Materials:
Stamps courtesy of Starving Artistamps – Mini Circle Background and Large Silhouette Asters
Cardstock
Patterned paper – Sunny Side Up!/Quick Quotes Paper
Memento stamp pads
ColorBox Black stamp pad and Black embossing powder/Clearsnap
Ribbon
Copper Brads
WISH-Butterflies card
Materials list:
Solid Cardstock
Patterned papers – Rockets Red Glare Collection/g.d.c. studios
Scallop and circle punches – Marvy
Butterfly punch – Martha Stewart
Notebook punch – Stampin’ Up
Liquid Embossing Finish – All Night Media/Plaid
Scallop trim – Doodlebug
Rub-on red flourish – American Crafts
Wish glitter sticker letters – Making Memories
Tonic Paper Distresser
Machine sewing

Thursday, September 11, 2008

It's sketch time again

Card Positioning Systems blog - Sketch #81 - ScraPerfect Sponsor
This week at CPS, ScraPerfect was the sponsor so each of the team members had the opportunity to see what this little pouch would do to improve stamping or printing. For my card, I ran the pouch over my green paper before I stamped my image and poured the embossing powder on it. Some papers and powders just seem to have a whole lot of static which makes for "stray" flecks of the embossing powder to stay on your paper and potentially ruin your image when you heat it. I would say that I didn't have ANY stray flecks after using the ScraPerfect pouch.
The close-up shows how crisp and clean my images are and I also wanted to show you my "faux" pearls. I used Plaid's Metallic Dimensional Fabric paint. The container has a tiny tip where the liquid comes out so you can get small dots like this and when the metallic paint dries it look like pearls.
This card uses last weeks, 2 Sketches 4 You, Kazan's Sketch #8 and I Am A Scrapaholic's September kit. If you like to doodle, this is the kit for you! I used my Sakura 3-D Glaze pens to give added accent to the doodles on the papers and punch outs.
This is Laura's Sketch #8 from 2 Sketches 4 You for this week. There are a couple details on this card that make it fun. One is that the flower print is actually a photo that I took in a friend's garden. I printed it on a textured, white cardstock.
Now sure if you can see the other interesting feature of this card, but I sprayed it with a green, Glimmer Mist. I sprayed the entire front of the card with the Glimmer Mist. It gave such a neat look to all of the papers and kind of tied them together.
Thanks for visiting, Linda (lbpost)
THE BEST IS YET TO COME card
Materials:
ScraPerfect – The Perfect Printing Pouch
Cardstock – Core’dinations
Two different background stamps and phrase stamps – Anna Griffin/All Night Media/Plaid
White stamp pad – Joann’s
White embossing powder
Flourish stamp – Memory Box
Metallic Fabric Dimensional paint – Plaid
Fluid Chalk stamp pads – ClearsnapMachine sewing
DOODLE-SWEET card
Materials list:
Cardstock - Prism
Patterned paper – Pop Star/7gypsies and orange paper/We R Memory Keepers
Punch out elements – 7gypsies
Glaze pens – Sakura
Alphabet stamp – Stampin’ Up
SERENITY card Materials list:
Cardstock – Core’dinations
Patterned paper – Pink Paislee and Scenic Route
Flower and leaf stamp – Magenta
My own photo
Rub-on word – LUXE
Glitter brad – Doodlebug
Tonic Paper Distresser
Green Glimmer Mist – Tattered Angels

Monday, August 11, 2008

THEN - NOW layout

The little photo on this layout was always my favorite school photo of our youngest daughter and when I got this great photo of her a year or so ago, I knew I wanted to use it for the comparison and then this song came to mind because I really don't have any idea where the time has gone and I know that I don't feel that much older!!!
I cut the flowers and designs from a patterned paper by We R Memory Keepers and then I used some Plaid Metallic Fabric Dimensional paint to add LOTS of accents. I love using these paints in either the glitter, the plain or the metallic for accents to cards and layouts. They come in containers with writing tips on them so you can control the amount you get and I just love what they add.
My title comes from the song and then I added in my journaling - all from the computer. I love to use the computer for journaling because I can choose the font and I can control the size of the box, etc. Two other things to notice - the machine sewing and the inking! These are my current "go to" techniques. Seems that I can't say something is finished until I have added these!
Thanks for visiting, Linda (aka lbpost)
Materials:
Solid Cardstock

Patterned Paper – Explore-Journey/White Out/We R Memory Keepers (design is cut from this)
Fluid Chalk stamp pads – Clearsnap
Rub-on letters – Making Memories
Orange rhinestones – Me & My Big Ideas
Paper Lace – Doodlebug
Metallic Folk Art Dimensional Fabric Paint – Plaid